Detours
Creating a Detour
Detours can be created in two different ways.
1. Clicking the “Save & Add a Detour” button while adding impacts to the TMP extent

2. Clicking the “Edit Detour” button after you have added the TMP extent impacts.

Once you have selected to create a detour, you will view this page:

You can toggle the instructions at any time by click the “View instructions” link on the top right (A). If you need to delete a detour, click on the "Delete detour" button (B)

Mapping the detour
To map your detour drag the A and B markers to the start and end points of your new detour.

Don’t worry if the detour line does not immediately take the route you want. The route can be changed by clicking and dragging the blue line to the desired location in order to route the detour to the correct streets.

Each click on the line will create a new waypoint for the detour, so you can click the same waypoints to move them again. The number of waypoints does not matter as only the route matters when generating the detour text description on the right-hand side.
Every time the A/B markers are moved or a waypoint is created or changed, the detour description on the right-hand side of the page will be updated with a text version of the steps for the detour. It also shows the distance and estimated travel time for the detour under that description.
If there needs to be an additional detour added, you can click the “Yes” radio button under “Is there more than one detour?”.

This will show an additional choice to be made. If the second detour will take approximately the same route as the first one, click “Yes” to “Is the detour the same as above?” This will replicate the first detour, but in the opposite direction making it quicker to create. If you click “No”, the second detour will be initially added to the start and stop points of the first impact just like the first detour was initially.
Here is an example of a layout with two detours:

As you can see, the description, distance, and estimated travel time are also displayed for the second detour.
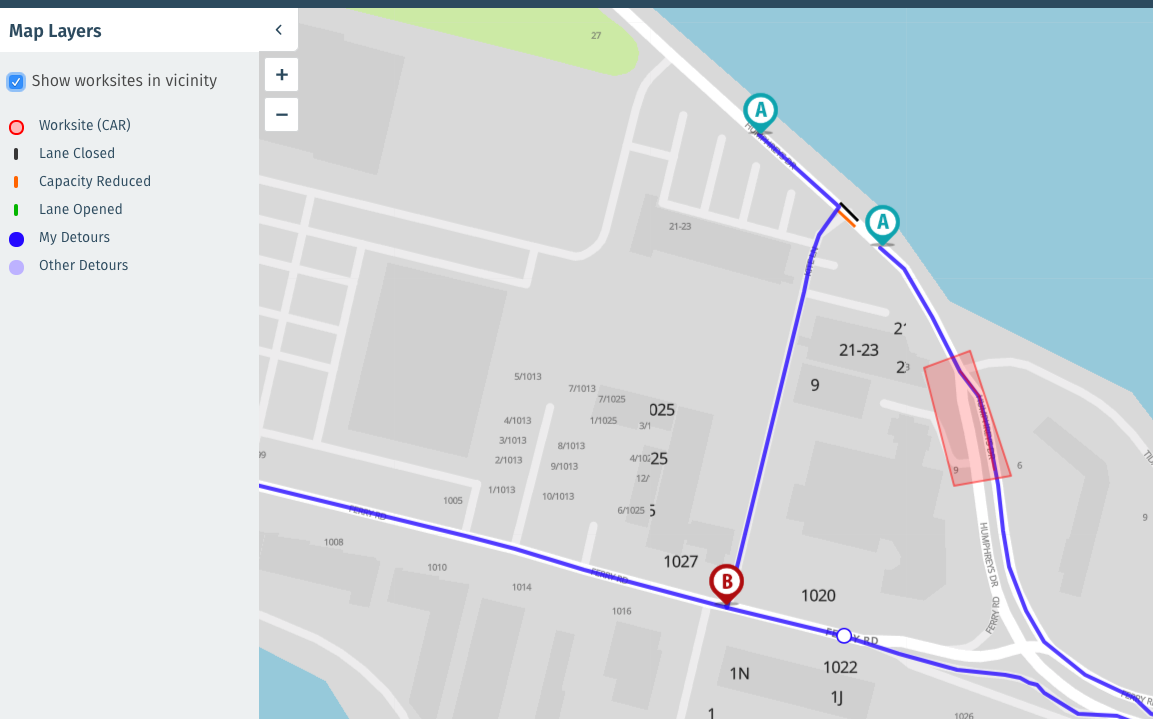
Avoiding clashes with other planned works
If you look to the top left of the page, you will see a checkbox for “Show worksites in vicinity”. When checked, this will show all accepted worksites, impacts, and detours in the area for the same date range as your TMP.
If dates have not been set yet, then you will see a note below the checkbox:

Saving and viewing your detour/s
Once the detour(s) has been added, you can click “Save & Return” on the bottom right of the screen to be taken back to the TMP layout form and continue submitting your TMP application as usual. After you finish the TMP layout form and click “Save Layout”, you will be able to see a small version of the TMP extent map with the detour routes included in the image. The detour descriptions, times, and distances will also be listed on the TMP page within each layout section.

The TMP PDF certificate will contain a page with the detour details along with a small map version showing the routes.